 Greg Hoffman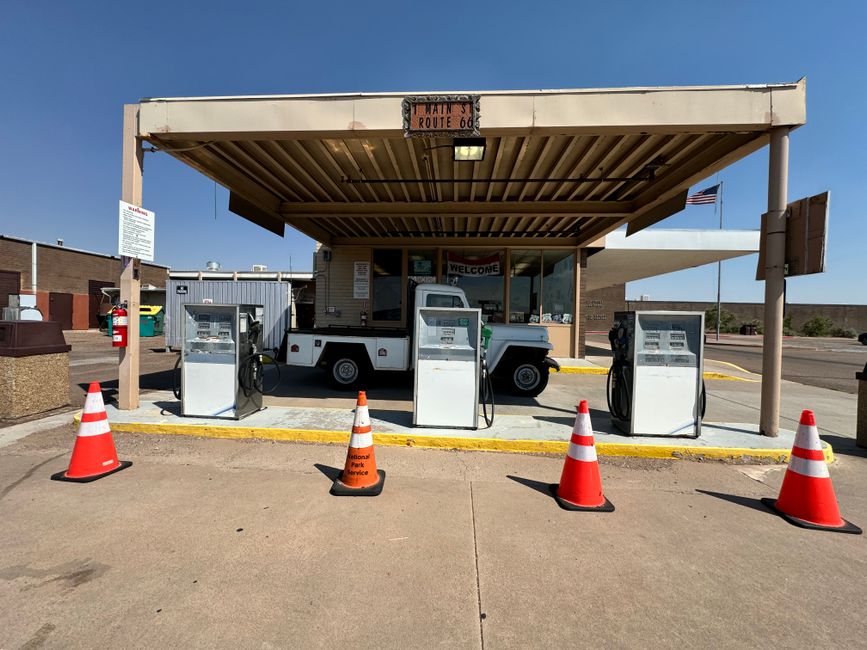
If you’re sitting in a campground right now with a full black tank and zero idea what happens next, take a breath. You’re not the first person to pull up to a dump station and just stare at it. I’ve watched experienced campers fumble with their sewer hose on a windy Tuesday morning. I’ve been that person. The dump station is one of those things nobody really explains before you drive away from the RV dealership, and yet you’ll deal with it every single week of full-time life.
Here’s what I tell people new to this: the dump station is not complicated, but it has a right way and a wrong way. The wrong way involves smell, regret, and a hose you’ll want to throw directly into the sun.
What a Dump Station Actually Is (and Where to Find One)
| Location Type | Typical Cost | Availability | Best For |
|---|---|---|---|
| State/National Park Campgrounds | Free-$8 | High | Full-time travelers |
| Truck Stops (Flying J, Pilot) | $5-$15 | Very High | Remote areas |
| Walmart | Free-$5 | Low (declining) | Budget camping |
| RV Parks & KOA | Free-$8 (guests) | High | Established routes |
| Rest Areas | Free-$5 | Moderate (Western US) | Interstate travel |
| Full-hookup RV Sites | Included | High | Convenience |
| Apps (Sanidumps, Campendium) | Free-$2/mo | On-demand | Planning & reviews |
A dump station is a designated disposal point for your RV’s waste tanks: your black tank (toilet waste) and gray tank (sink and shower water). Some are just concrete pads with a pipe in the ground. Others have rinse water, a hose bib for flushing, even a trash can. You’ll find them at:
- Most state and national park campgrounds
- Truck stops (Flying J and Pilot are your best bets)
- Walmart locations, though fewer allow this now than they used to
- Dedicated RV parks and campgrounds
- Some rest areas along interstates, particularly in western states
- KOA and other private campground chains almost always have them
Apps like Campendium, iOverlander, and Sanidumps are worth having on your phone. Sanidumps is what I actually use. It’s got user reviews, GPS coordinates, and notes about whether you need to pay or show a membership card. Dump stations cost anywhere from free to about $15 for non-guests, though $5 to $8 is typical at commercial spots.
You’ll also encounter dump stations at your site if you’re in a full-hookup spot. That’s the easy version. Plenty of people dry camp or stay at partial-hookup sites, though, so knowing how to use a central dump station is non-negotiable if you’re living in an RV.
The Gear You Actually Need Before You Roll Up
Showing up unprepared is how you end up improvising with inadequate equipment.
A quality sewer hose. Don’t cheap out. The ones bundled with most RVs are thin and crack easily. I’ve been using a Camco RhinoFLEX for years and it holds up. Get a 20-foot hose, because you’ll run into dump stations where the distance between your RV’s outlet and the sewer inlet is longer than expected.
Hose fittings and adapters. A 90-degree elbow fitting keeps your hose sealed at the drain opening. Some stations have different inlet sizes, so carrying a small adapter set costs almost nothing and saves a lot of stress.
Nitrile gloves. Not latex, because latex degrades faster and some people are allergic. Keep a box under your wet bay and put them on before you touch anything.
A dedicated bucket. For rinsing the hose and the area around the drain when you’re done.
A hose specifically for tank rinsing. This is completely separate from your drinking water hose. Label them differently. Store them differently. This hose connects to a water source at the dump station and rinses your tanks and sewer hose before you pack up. Never use your drinking water hose at a dump station.
A surge protector and water filter are electrical and water safety basics for RV life in general, but at the dump station specifically, your focus is on the sewer hose setup and keeping cross-contamination out of your system. (This site may earn a commission on qualifying Amazon purchases.)
Step-by-Step: How to Actually Dump Your Tanks
This is the part most guides skip over or make vague.
1. Pull up and assess the station. Position your RV so the outlet valve is as close to the sewer inlet as possible without blocking other rigs. If there’s a line, wait and watch what the person ahead of you does.
2. Put your gloves on before you do anything else. This is the step people skip when they’re in a hurry. Don’t.
3. Connect your sewer hose to your RV’s outlet. Twist it onto the bayonet fitting until it locks. Give it a firm tug to confirm it’s seated. A hose that disconnects mid-dump is entirely preventable and completely nightmarish.
4. Place the other end into the dump station inlet. Use your 90-degree elbow to seal it against the ground fitting. Some people use a rubber doughnut seal here. Anything that keeps the connection snug and reduces splashback.
5. Open the black tank valve first. Always black before gray. Your gray water is relatively clean and will rinse the hose after the black tank drains.
6. Let the black tank drain completely. You’ll hear the flow stop and the hose will go limp. Don’t rush this.
7. If the station has a rinse hose, use it. Insert the tank rinse wand into your toilet and flush fresh water through the black tank while the valve is open. This breaks up remaining solids and significantly reduces odor issues between dumps. Some RVs have a built-in tank flush fitting near the outlet, which is even better.
8. Close the black tank valve. Open the gray tank valve. Let it drain completely. The gray water flushes residue out of your sewer hose.
9. Close the gray tank valve. Rinse your hose externally if there’s a water source available.
10. Disconnect from the dump station inlet first, then from your RV. Fold the hose carefully to keep any remaining liquid contained. Rinse it out, let it drain, and store it in your dedicated hose carrier or bumper tube.
11. Rinse the area around the dump inlet if you made any mess. Common courtesy, and in some states it’s required.
12. Gloves off, dispose of them, wash your hands.
The whole process takes 10 to 20 minutes depending on how full your tanks are and whether there’s a rinse connection available.
Tank Management Between Dumps: This Is What Most Guides Don’t Tell You
How you manage your tanks between dump stops matters as much as the actual dumping. Most new full-timers are surprised by how quickly tanks fill and how bad odor problems can get when you’re not doing this right.
Keep water in your black tank. At least a few inches after each dump. This helps break down waste and prevents solids from drying out and sticking to the tank walls, which causes sensors to read falsely full.
Use the right chemicals. I’ve tried half a dozen tank treatments and the enzyme-based ones work significantly better than formaldehyde products. Happy Campers and Unique RV Digest-It are both solid. Drop them in after each dump with a couple gallons of water.
Don’t leave your black tank valve open at full hookup sites. I see this constantly. It dries out the tank and creates what’s known as a “poop pyramid,” which is exactly as bad as it sounds. Open the valve to dump, then close it again.
Dump when your black tank is around two-thirds to three-quarters full. You want enough liquid volume to flush everything out effectively. Dumping a nearly empty black tank leaves solids behind.
Your gray tank can be dumped more frequently since it’s less problematic, but don’t leave that valve hanging open either. You want some water weight in the gray tank to flush the hose when you dump.
Dump Station Etiquette and the Rules Nobody Posts
Sources
The social rules around dump stations are real, and violating them will earn you dirty looks from people who’ve been RVing a lot longer than you.
Don’t leave your rig unattended. Move the RV to get close enough, then immediately start your process. People are waiting.
Clean up after yourself. Any drips, spills, or mess around the drain inlet should be rinsed before you pull away. Most stations have a hose for this. Use it.
Don’t use the drinking water tap at the dump station for anything other than tank rinsing. That spigot isn’t for filling your fresh water tank. Don’t do it.
Don’t block the entrance lane while you’re set up. Some people pull halfway in with their tow vehicle hanging into traffic. Pull fully into the station.
If someone is struggling, offer to help. The RV community is generally good about this. I’ve helped plenty of first-timers at dump stations and been helped myself when something went sideways.
The dump station stops being intimidating after the second or third time. It becomes routine, like filling up with diesel or checking tire pressure. A little preparation, the right gear, and knowing the sequence makes it all take less than 20 minutes start to finish. Full-time RV life has plenty of genuinely hard things in it. This one, once you know it, stops being one of them.
Photo: Valeria Dominguez via Pexels