 Julia Davidson
Most RV coverage about BLM camping reads like a brochure written by someone who spent one weekend at a developed campground and called it “dispersed.” They’ll tell you it’s free, it’s beautiful, and you just need to “check the rules.” What they skip: the road conditions that will destroy your rig if you pick the wrong site, the 14-day clock that catches beginners off guard, and the fact that “free” camping still carries real costs if you’re not set up for it. Here’s what actually matters.
What BLM Land Is (and What People Get Wrong About It)
Bureau of Land Management land covers roughly 245 million acres across the American West. That’s more than any other federal agency manages, and the overwhelming majority of it allows dispersed camping at no charge, no reservation, no ranger checking your paperwork at a gate.
The freedom is real. But people confuse “open” with “easy.”
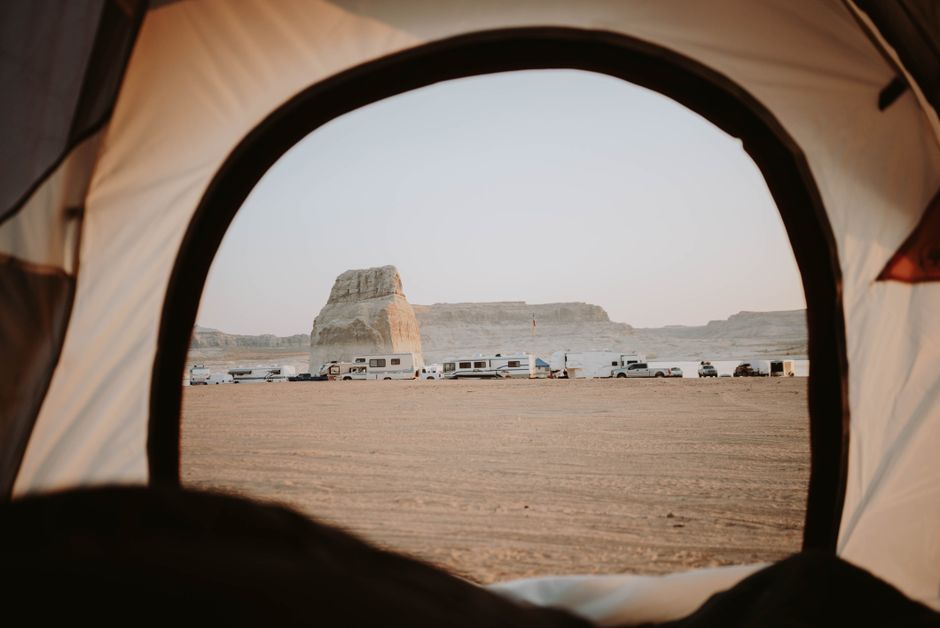
BLM land is not a campground. There are no hookups, no dump stations, no camp hosts. Cell service is often nonexistent. Roads can shift from passable to genuinely dangerous after a single rainstorm. The land doesn’t care about your timeline or your slide-out. The agency’s general rule is 14 consecutive days in one area, after which you must move at least 25 miles before returning. Some field offices have tighter restrictions, and a few high-demand areas like southern Utah’s BLM corridor near Moab run seasonal closures.
Here’s where most guides get it wrong: people assume “BLM land” is one uniform policy. It’s not. Each BLM field office sets its own specific rules, and those rules can vary dramatically from county to county. Before you leave your driveway, you need the specific field office number for where you’re headed, not just a generic BLM website search.
How to Find and Vet a Site Before You Commit Your Wheels
| RV Type | BLM Dispersed Suitability | Key Consideration |
|---|---|---|
| Class B Van | Excellent | Works fine at most sites |
| Truck Camper | Excellent | High clearance advantage |
| Small Class C | Good | Generally accessible |
| Large Class C | Moderate | Requires road research |
| Class A (30 ft) | Moderate | Need established areas or careful vetting |
| Class A (35+ ft) | Limited | Established BLM areas only |
| Fifth Wheel (35+ ft) | Limited | Established BLM areas only |
| Low Clearance (<8 in) | Poor | Viable sites shrink significantly |
Bad site selection is expensive. A blown tire on sharp volcanic rock. A wet clay road that swallowed a 26-foot trailer. A wash that flooded overnight. I’ve seen all of it. Due diligence before arrival is not optional.
The tools that actually work:
- Freecampsites.net and iOverlander pull user-reported GPS coordinates with photos and recent reviews. Sort by most recent comments. A site praised in 2019 may have a new gate or a washed-out access road now.
- OnX Offroad and Gaia GPS show land ownership layers so you can confirm you’re actually on BLM land, not private or state land where camping may be prohibited or prosecuted.
- The BLM’s own GeoPlatform is clunky but authoritative. Cross-reference it with the apps above.
- Google Earth historical imagery lets you look at the access road in different seasons. If it looks wet and rutted in aerial photos from March, assume you can’t get in during winter or spring.
Call the local field office if you have any doubt about road conditions. These folks are often more helpful than you’d expect, and they’ll tell you straight whether a particular area is accessible for a 30-foot Class A or only for a truck camper with high clearance.
Rig-specific reality check: most BLM dispersed sites work fine for Class B vans, truck campers, and smaller Class C rigs. Class A motorhomes and fifth wheels over 35 feet need established BLM camping areas with graded roads, or you’re looking at careful research of every access point. Low-clearance is the killer. Less than 8 inches off the ground? Your list of viable dispersed sites shrinks fast.
Setting Up to Actually Live Off-Grid
BOONDOCKING 101: Newbie guide to FREE CAMPING · Home A Roam on YouTube
This is where the cost of “free” camping becomes obvious. If you’re not self-sufficient, you’ll be driving 30 miles to a dump station every three days and rationing water from gallon jugs. That’s not freedom. That’s inconvenient camping.
The baseline setup for comfortable BLM living, prioritized:
Fresh water capacity. Know your exact tank size and your real daily consumption. Two people cooking and doing dishes typically use 3 to 5 gallons per day if you’re mindful. A 40-gallon tank gives you 8 to 12 days if you’re not showering inside. Add a quality inline water filter for when you fill up at a spigot or natural source. (This site may earn a commission on qualifying purchases.)
Power. A generator works, but it’s loud, burns fuel, and it’s antisocial around other campers. Solar is the real answer. I run 400 watts of roof panels with a 200Ah lithium battery bank, which covers my laptop, lights, refrigerator, and phone charging indefinitely in good sun. A battery monitor is non-negotiable: you need real data, not a guess, about your state of charge. (This site may earn a commission on qualifying purchases.)
Leveling. BLM sites are rarely flat. Leveling blocks and a good set of chocks will save your refrigerator’s cooling unit and your own sanity. (This site may earn a commission on qualifying purchases.)
Waste management. Gray and black tanks fill faster than you expect when you’re not connected to a sewer. Find out where dump stations are within a reasonable radius before you park. Most BLM areas near towns have at least one nearby. Many Flying J and Pilot truck stops charge $10 to $15 for a dump. Budget it.
Step-by-Step: Arriving at a BLM Site the Right Way
This sequence prevents problems.
- Confirm land status before you lose cell range. Pull up OnX or Gaia and verify you’re looking at BLM land, not a private inholding.
- Check weather for 72 hours. Rain the night before arrival can make a clay road impassable by morning. Check the region, not just the nearest town.
- Scout on foot or by vehicle first if the access road is uncertain. Drive in with your tow vehicle, or walk it. Don’t commit your rig to a road you haven’t seen.
- Pick a site that’s already disturbed. BLM guidelines ask you to use existing fire rings and established camping spots when available. Don’t carve new paths through vegetation.
- Park and level. Get the rig level before you extend slides or run stabilizers. Leveling blocks under the low-side tires, then chock all wheels. (This site may earn a commission on qualifying purchases.)
- Document your arrival date. Set a phone reminder for day 12 of your stay. Packing up a day or two early beats getting flagged by a ranger for overstaying.
- Establish your site perimeter and Leave No Trace. Pack out all trash. Dig a cat hole at least 200 feet from water sources if you’re going outside. Keep your campfire ring established and contained, and check for fire restrictions before you light anything.
The Comparison: BLM Dispersed vs. BLM Developed vs. National Forest
People group all of these together and they shouldn’t. The differences matter.
| Feature | BLM Dispersed | BLM Developed Area | National Forest Dispersed |
|---|---|---|---|
| Cost | Free | $8 to $25/night | Free |
| Hookups | None | Occasionally electric | None |
| Stay limit | 14 days (usually) | 14 days | 14 days |
| Road access | Variable, often rough | Generally graded | Variable |
| Cell service | Rare | Rare to occasional | Rare |
| Crowd level | Low to moderate | Moderate | Low to moderate |
| Reservations needed | No | Sometimes | No |
| Fire rings provided | Sometimes | Usually | Sometimes |
| Dump station nearby | Sometimes | Often on-site | Rarely |
The practical takeaway: BLM developed areas like Cottonwood Cove in Nevada or the Alabama Hills Campground in California give you better road access and sometimes water, but they come with fees and often crowds. True dispersed camping gives you solitude but demands full self-sufficiency. National Forest dispersed camping follows similar rules and is often more accessible in the Pacific Northwest, where BLM land is less prevalent.
The Real Costs and the Mistakes That Add Up
Sources
“Free” BLM camping is real, but it’s not cheap if you’re not prepared.
Fuel is the invisible cost. Moving every 14 days burns gas. A 35-foot Class A getting 8 mpg, driving 25 miles to a new site plus 60 miles round trip to town for water and supplies twice a week, burns $50 to $100 weekly on fuel alone. That’s real money.
Repairs from rough roads are the other one nobody talks about. A corrugated dirt road at 20 mph will shake loose every cabinet latch, loosen connections, and stress your frame. I started doing a full walk-through inspection after every rough road drive: I check slide mechanisms, verify cabinet latches are intact, look under the rig at the frame and hitch, and check tire pressure. Alkaline desert roads are especially harsh on tires because of the sharp rock edges.
Internet is a genuine challenge. If you work remotely, budget for a Starlink subscription or a solid cellular booster setup. T-Mobile Home Internet on an RV plan and Starlink RV cover most BLM areas I’ve camped in across Nevada, Arizona, and Oregon, but dead zones exist. Test your connection before you plan a workday around it.
One more: surge protectors matter less in dispersed camping since there’s no shore power, but if you’re combining BLM nights with occasional campground hookups during your circuit, don’t skip one. (This site may earn a commission on qualifying purchases.)
Eight years in, I still get excited pulling off a paved road onto a two-track knowing there’s no reservation, no check-in window, and no neighbor 15 feet away. BLM land does that. But the people who have the best experience are the ones who treated “free” as an invitation to prepare harder, not an excuse to show up without thinking. Know your rig’s limits, know the rules for your specific area, and you’ll find campsites that most RVers never see.