 Greg Hoffman
Most people think backing into a campsite is harder than it actually is. The thing that makes it hard isn’t the physics, it’s the panic. And panic is fixable.
I’ve been backing 40-foot fifth wheels and 26-foot travel trailers into tight spots for eight years now. I’ve done it solo at 11pm with a headlamp, in the rain, on a slight downhill grade with a gravel shoulder crumbling under my driver’s side tires. I’m not telling you it gets effortless, but I will tell you that the gap between “white-knuckling it every time” and “doing it confidently” is mostly just understanding a handful of things nobody explains clearly.
Let’s get into the actual mechanics.
Why Your Instincts Are Wrong (And How to Fix That)
| RV Type | Length | Backing Complexity | Author Experience |
|---|---|---|---|
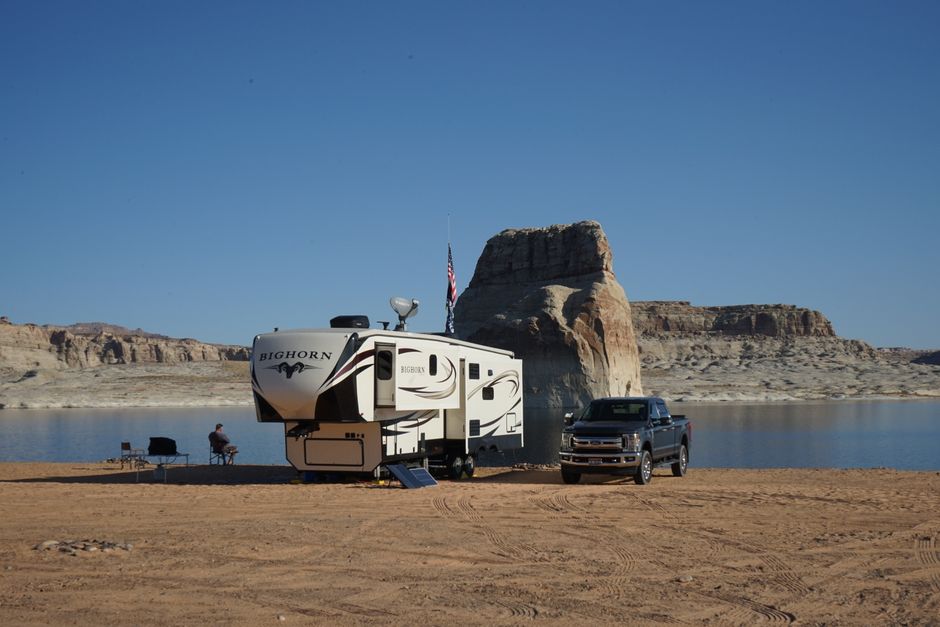
| Fifth Wheel | 40 feet | High | 8 years, multiple scenarios |
| Travel Trailer | 26 feet | Moderate | 8 years, multiple scenarios |
| Travel Trailer | 24 feet | Moderate | Reader feedback (Keystone Passport) |
| Fifth Wheel | 38 feet | High | Solo backing, camera-assisted |
The single biggest source of confusion is direction. When you back up a trailer, the trailer goes the opposite way from your steering wheel. Turn the wheel left, the back of the trailer swings right. That’s it. That’s the thing that trips up everyone who’s ever grabbed a steering wheel at the bottom of a campground loop and immediately jackknifed into their neighbor’s awning.
What actually helps is thinking about your hand position on the bottom of the steering wheel instead of the top. If you want the trailer to go left, slide your bottom hand left. Your hands will naturally correct the wheel input. This sounds too simple to work. I was skeptical too. But after a reader emailed me about struggling with a new 24-foot Keystone Passport, I suggested the bottom-of-wheel trick and they came back a week later saying it clicked immediately. It genuinely helps.
The other instinct that betrays you: going too fast. Speed amplifies every error. In 8 years, I have never seen someone back into a site too slowly. I’ve seen plenty of jackknifes that happened because someone tried to “just get it in quick.” Keep your foot barely touching the gas. A good backing speed is roughly walking pace. If someone walking alongside could keep up with you without jogging, you’re in the right range.
Before You Even Start Reversing
Get out and walk the site. Every time, no exceptions. Even if you’ve stayed at that exact campground before. Even if it looks simple. You’re looking for:
- The actual width of the opening (not the same as the pad width)
- Any soft ground, low-hanging branches, or buried utility hookup pedestals
- Whether the site slopes side-to-side or front-to-back
- Where you need your door and your hookups to end up
That last one matters more than most beginners realize. You want your shore power inlet close to the pedestal. You want your entry door not facing directly into your neighbor’s living space. You want your awning side facing your outdoor living area. Walking the site first lets you plan your final position, not just “get it in.”
Scenario: First night at a packed campground in Moab, tight loop with 8-inch clearance on each side. Spent 4 minutes walking the site, identified a buried propane pedestal that wasn’t on the campground map. Planned my approach to arc wide right. Backed in clean on the second pull-up with zero contact. Would have hit that pedestal on the first attempt without the walk-around.
The Pull-Up, the Pivot, and the Angle
Here’s the actual sequence, step by step, because I think most advice on this is too vague to be useful:
1. Drive past the site entrance and set up your angle. You want to position your tow vehicle so the trailer is at roughly a 45-degree angle to the site when you stop. For most right-side-entry sites, this means pulling forward until your hitch is approximately level with the site entrance, then angling your truck to the left (driver’s side away from the site).
2. Start reversing slowly. As you back, watch your mirrors. Both of them. You’re looking for the trailer sides in relation to the site edges, not just the back of the trailer.
3. Straighten out once the trailer is tracking into the site. This is where most people over-correct. Once the trailer is pointed into the site and tracking straight, you need to straighten your wheel to prevent jackknifing. Don’t wait too long on this.
4. Make micro-adjustments with small wheel inputs. Short, gentle corrections beat big sweeping wheel movements every time.
5. Have a plan for pulling forward. If you’re off, pull out and reset. One clean second attempt beats four ugly half-corrections.
Scenario: Early in my third year, I tried to “save” a bad backing attempt at a full Jellystone campground on a Saturday night instead of pulling out and resetting. Three pull-ups and corrections later, I was still crooked and there were now six rigs waiting on me. Reset on attempt four, clean in on attempt five. Total extra time: maybe 7 minutes. Lesson: resetting is faster than fixing.
Using a Spotter Without Losing Your Mind
I’ll be honest: spotters are a mixed bag. A bad spotter is worse than no spotter. I’ve watched couples have their worst fight of the season over a Thursday-night backing job at a KOA.
If you’re using a spotter, agree on hand signals before you move. Not gestures. Not “you know, the usual.” Specific, agreed-upon signals: raised fist means stop, hands apart means go wider, hands together means come in. Whatever works for you two. Establish those signals in the parking lot before you ever pull into the campground.
If you’re solo, a $50-$150 wireless backup camera (I’ve had good experience with the Furrion Vision S and the Haloview MC7108) changes the game significantly. You lose the mirror blind spots, and you can actually see the ground behind your trailer. As of June 2026, most of these cameras run off a 12V connection or even magnetic mounts and require no wiring if you’re not committed to a permanent install.
Scenario: Backed into a narrow tree-lined site at Assateague Island National Seashore solo, 38-foot fifth wheel, no signal. Used the Haloview camera to spot a root cluster that wasn’t visible in mirrors. Adjusted approach left by about 2 feet. Landed level and clear.
Leveling Once You’re In
Getting into the site is half the job. Getting level is the rest. What surprised me early on was how much an unlevel rig affects daily life: doors that swing open or closed on their own, refrigerator efficiency, sleep quality, even water drainage in the shower. It’s not cosmetic.
I use Camco leveling blocks (the original orange ones) on the low side, typically 2-4 blocks stacked depending on the grade. A set runs about $25-$30 and I’ve had the same set for five years. I check my level with a cheap bubble level on the counter, not an app, because I’ve had apps give me slightly wrong readings when the phone wasn’t sitting flat.
Side-to-side leveling comes first, because you do it under the tires. Front-to-back leveling comes after, using your tongue jack or fifth wheel landing gear. Don’t fight the order on this.
Sources
- RV Industry Association (RVIA): Industry data on RV ownership trends, safety practices, and equipment standards
- National Highway Traffic Safety Administration (NHTSA): Research on towing safety, trailer sway, and backing accidents involving towed vehicles
- Escapees RV Club: Community-sourced guides and training resources for full-time RVers, including campsite maneuvering basics
- Camco RV Product Documentation: Manufacturer guidance on leveling block use, weight ratings, and placement
- Recreation Vehicle Safety and Education Foundation (RVSEF): Driver education data and training outcomes for backing, towing, and campsite setup
Photo: Mew wy. via Pexels